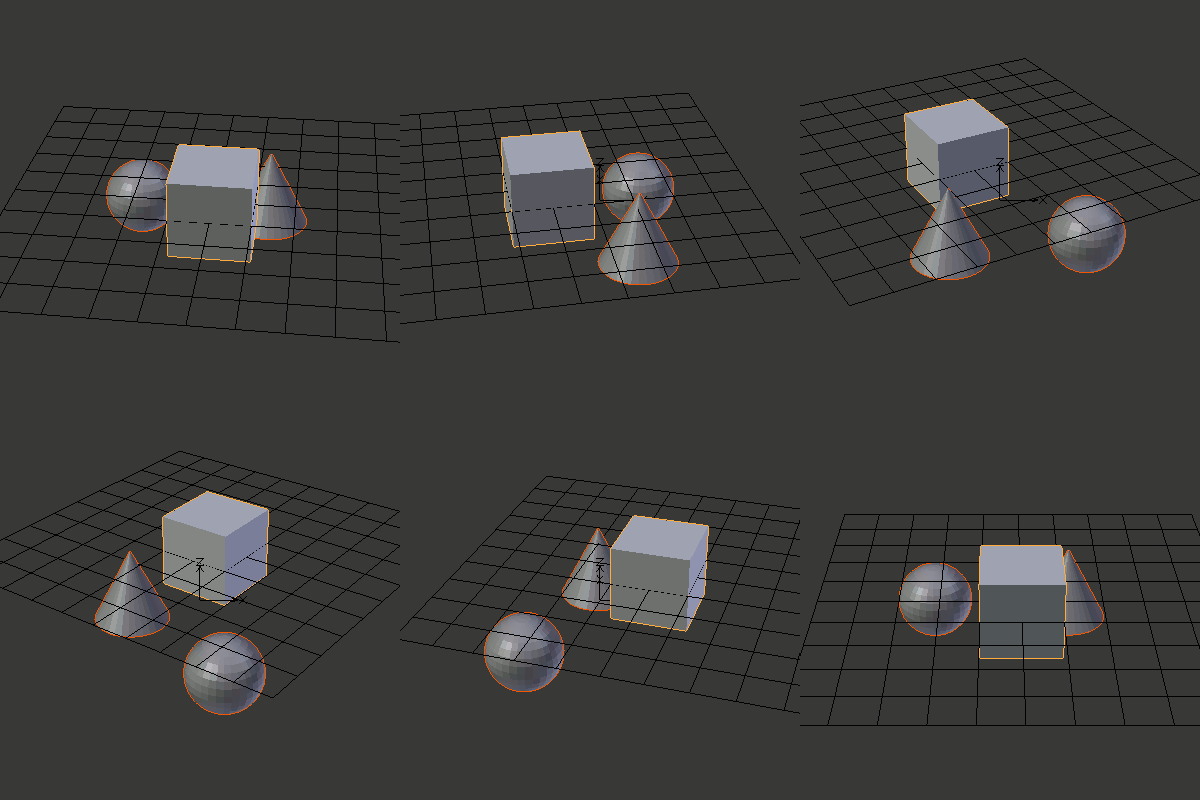
回転設定させた他ファイルに読み込むという記事を書かれていましたが
スクリプトで回転を設定したカメラを作る方式のものを需要があるのではと
以前作成したものを調整して公開します
選択しているオブジェクトの中心と範囲を計算して
ビュー内にオブジェクトが収まるような位置でカメラを回転させます

スクリプトのテキストを Blenderのテキストエディタで開いて
回転表示させたいメッシュオブジェクトを選択して実行すると
回転アニメーションを設定したEmptyとその子に配置したカメラを作成します
デフォルトでは 80mmのカメラでオブジェクトを上方30度から見下ろす設定になっていて
6行目と8行目にある数値を変更することで調整できます
import bpy
import math
import mathutils

#俯角(オブジェクトを見下ろす角度 0)で水平)
Depression_deg = 30  #digree
#レンズの画角(35mm換算)
focal_length = 80    #35mm equivalent focal length

def main(camera_angle, Depression):
    context = bpy.context
    #選択オブジェクトのBBoxを取得中心位置の計算
    (bbox_width, center_pos) = get_bound_data(context)
    #カメラまでの距離を計算(外接球の半径を 最大幅/2 *1.8と設定)
    d_camera = max(bbox_width)*1.8 /math.sin(camera_angle)
    #?アスペクト比での補正は?
    #Blenderはカメラ毎にレンダリング解像度の情報を持ったりできないので 正方形でもしくは形状に合った比率で手動設定すると仮定
    #アスペクト比を取得して 短辺に合わせるよう補正することも考えられる
    table_empty = set_table_obj(camera_angle, Depression, center_pos, d_camera)
    #カメラの回転アニメーションを作成
    set_turn( context, table_empty )


#選択形状から描画範囲のデータを取得(中心点, 幅)
def get_bound_data(context):
    #get bound box size and center
    objects = context.selected_objects
    bb_point_list = []
    #選択形状のbbox値をグローバル座標で取得
    for obj in objects:
        if obj.type != 'MESH':continue
        bbox_list = [mathutils.Vector(v[:]) for v in obj.bound_box]
        mat = obj.matrix_world
        bb_point_list += [mat*v for v in bbox_list]
    if bb_point_list == []:
        return([2,2,2],[0,0,0])
    #範囲を取得
    bbox_width = []
    center_pos = []
    for i in range(3):
        min_i = min(bb_point_list, key = (lambda x: x[i]))[i]
        max_i = max(bb_point_list, key = (lambda x: x[i]))[i]
        bbox_width.append( max_i - min_i )
        center_pos.append( (max_i + min_i)/2 )
    return(bbox_width, center_pos)

def set_table_obj(camera_angle, Depression, center_pos, d_camera):
    #meke turn table objects
    #親になるエンプティをオブジェクトの中心に作成
    table_empty = bpy.data.objects.new( "empty", None )
    bpy.context.scene.objects.link( table_empty )
    table_empty.location = center_pos
    table_empty.empty_draw_type = 'ARROWS'

    #設定に従ってカメラを作成
    cam = bpy.data.cameras.new("TurnCamera")
    camera1 = bpy.data.objects.new( "Camera", cam )
    bpy.context.scene.objects.link( camera1 )

    camera1.location.x = 0
    camera1.location.y = -1*d_camera *math.cos( Depression )
    camera1.location.z = d_camera *math.sin( Depression )
    camera1.rotation_euler.x = math.pi/2 -Depression
    camera1.data.angle = camera_angle

    #カメラをエンプティの子に
    camera1.parent = table_empty
    return(table_empty)

def set_turn( context, table_empty ):
    #set tuabe animation
    context.scene.frame_set(0)
    table_empty.keyframe_insert(data_path="rotation_euler")
    context.scene.frame_set(100)
    table_empty.rotation_euler.z = 2*math.pi
    table_empty.keyframe_insert(data_path="rotation_euler")
    for fcurve in table_empty.animation_data.action.fcurves:
        fcurve.keyframe_points[0].interpolation = 'LINEAR'
        fcurve.keyframe_points[1].interpolation = 'LINEAR'

def focallength_to_fov(focal_length):
    #return( 2.0 *math.atan((sensor/ 2.0) / focal_length) )
    return( 2.0 *math.atan((32/ 2.0) / focal_length) )

camera_angle = focallength_to_fov(focal_length)
Depression = math.pi *Depression_deg/180
main(camera_angle, Depression)
レンダリング画像の設定は正方形になっているのを想定しています
必要に応じて画像サイズやカメラ位置を微調整してください
回転動作は0フレームで正面 100フレームで一周した正面に回転になっています
例えばアニメーションの開始を1 終了を100にして連続再生すれば連続して回転したようになります
This Script to Create a Turntable Animatied camera.
0 件のコメント:
コメントを投稿